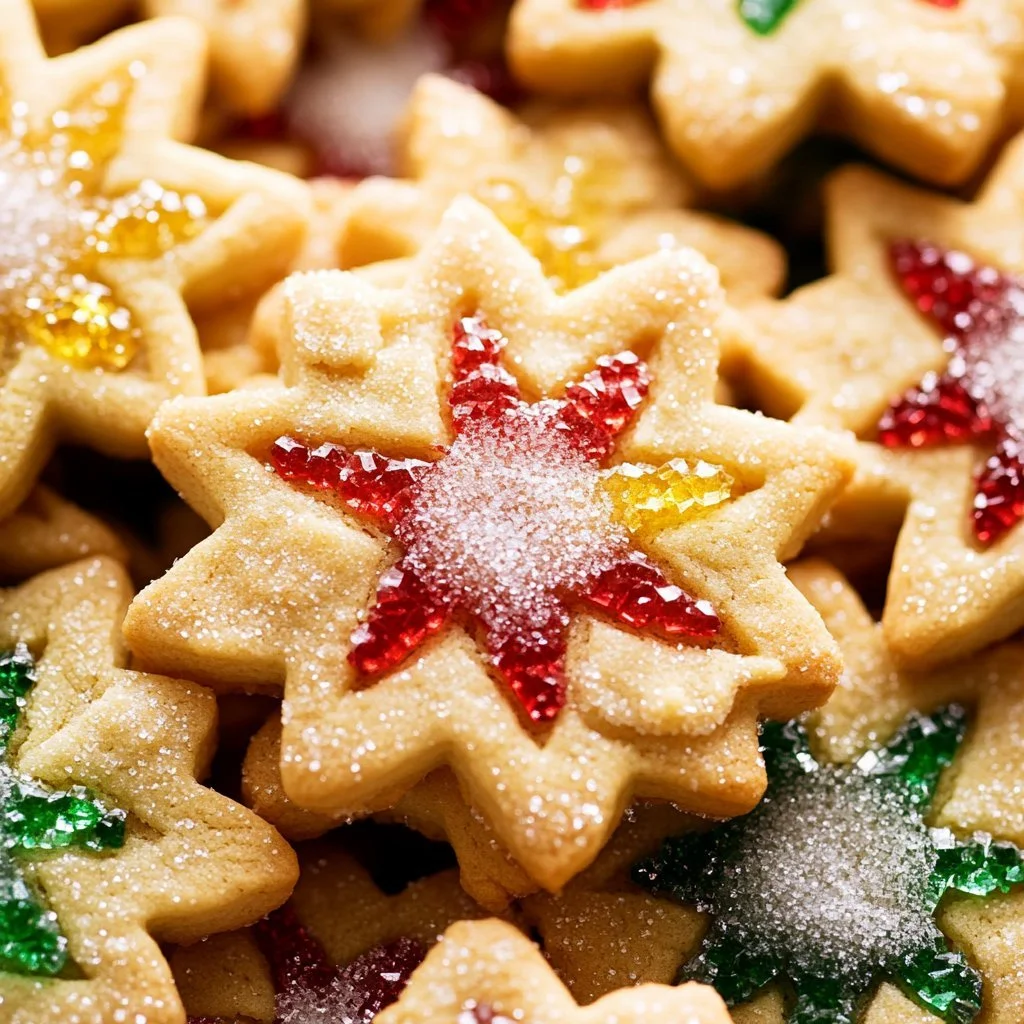
Stained Glass Window Sugar Cookies
Stained Glass Window Sugar Cookies are a delightful treat that brings a burst of color and sweetness to any occasion. The moment you bite into these cookies, a rainbow of flavors will dance on your palate, blending the buttery richness of the cookie with the crunchy, sweet notes of the candy filling. They are not just cookies; they are edible art, captivating and enchanting both children and adults alike. This recipe is perfect for every baking enthusiast looking to impress family and friends while enjoying a fun, step-by-step cooking experience.
When you’re searching for a recipe that marries simplicity with festive flair, Stained Glass Window Sugar Cookies are the answer. They’re incredibly versatile, making them a delightful treat for holidays, special celebrations, or just an average day that deserves a sweet touch. What’s more? The process of creating these gorgeous cookies is a fantastic activity to engage in with loved ones, crafting memories along with the treats.
Why You’ll Love This Recipe
These Stained Glass Window Sugar Cookies win on many fronts. Firstly, they boast easy prep—minimal ingredients, familiar kitchen staples, and straightforward techniques make this recipe a breeze, allowing even novice bakers to shine. These cookies are family-friendly, perfect for getting kids involved in the kitchen, allowing them to stomp around the flour and witness a little sugar magic.
Whether you’re baking them for a special occasion or just for fun, these cookies embody tradition with a whimsical twist. They require only a handful of ingredients, all of which come together to create a deliciously sweet tie between cookie and candy. What’s not to love?
Ingredients for Stained Glass Window Sugar Cookies
- 2 and 1/4 cups all-purpose flour – This forms the base for our delightful sugar cookies.
- 1/2 teaspoon baking powder – A critical agent that gives the cookies their fluffy, tender texture.
- 1/4 teaspoon salt – Enhances the sweetness and balances the flavors perfectly.
- 3/4 cup unsalted butter, softened – The rich flavor that creates a tender cookie.
- 3/4 cup granulated sugar – Sweetness in its purest form, contributing to the cookie’s delightful flavor.
- 1 large egg – Binds the ingredients and adds moisture.
- 2 teaspoons pure vanilla extract – A fragrant touch that elevates the cookie’s flavor profile.
- 15-20 unwrapped hard candies (e.g., Jolly Ranchers or Life Savers) – The colorful filling that mimics a stained glass window.
- 1 large egg white or 2 tablespoons water – Used for brushing the cookies before baking.
- 1/3 cup coarse sugar or sprinkles – Adds an extra crunch and sparkle.
Step-by-Step Directions for Stained Glass Window Sugar Cookies
-
In a medium bowl, whisk together the flour, baking powder, and salt. This combination provides a solid base for our cookies while ensuring even distribution of the leavening agent.
-
In a large mixing bowl, cream the softened butter and granulated sugar together on high speed until smooth. This step is crucial as it incorporates air into the butter, resulting in lighter cookies.
-
Next, beat in the egg and vanilla extract into the creamed mixture until well combined. This elevates the overall flavor, making each bite incredibly delightful.
-
Gradually blend the dry mixture into the wet ingredients, mixing until just combined. Avoid over-mixing to keep the cookies tender. Once combined, chill the dough for 1-2 hours to allow the flavors to meld.
-
Preheat your oven to 350°F (177°C) and line your baking sheets with parchment paper, making for easy cleanup.
-
Roll out the chilled dough evenly on a lightly floured surface, then use cookie cutters to cut out your desired shapes. Remember to cut out centers from half of the shapes for the candy filling!
-
Brush the remaining cookies with egg white or water, then fill their centers with crushed hard candies. This is where creativity shines—use an array of colors!
-
Bake the cookies for 12-13 minutes or until edges begin to lightly brown. The candies will melt beautifully during baking, resembling colorful stained glass.
-
Allow the cookies to cool on the baking sheet for a few minutes before transferring them to a wire rack to cool completely.
Tips & Tricks
- Chill the Dough: For easier handling and superior texture, never skip the chilling step. It makes cutting shapes effortless!
- Color Harmony: If you’re aiming for a specific theme (like holiday colors), match your candy to fit the occasion.
- Candy Variety: Experiment with various candies to create unprecedented flavors and colors. Soft candies can make for a unique texture as they won’t fully harden.
- Egg Wash: For added shine, consider adding a sprinkle of coarse sugar before baking after brushing with egg wash.
- Make Ahead: These cookies can be made ahead and stored in an airtight container, making your celebrations even smoother.
Serving Suggestions & Pairings
Serve your Stained Glass Window Sugar Cookies beautifully displayed on a decorative plate, perhaps surrounded by complementary fruit or thematic decorations. These cookies shine during holidays like Christmas or Easter, serving as a colorful centerpiece on dessert tables. Pair them with a glass of milk, a steamy cup of tea, or even a sweetened coffee for a delightful afternoon treat.
You can also get creative with how you package them for gifts; think clear bags tied with colorful ribbons for festive occasions!
Nutritional Information
While treats like these sugar cookies are indulgent, they remind us of the joy desserts bring. Each cookie may contain roughly 120 calories, subject to size and specific ingredients. They’re buttery, sweet, and sure to be a crowd-pleaser without inducing guilt—moderation is key.
Storing Tips & Variations for Stained Glass Window Sugar Cookies
To store your cookies, place them in an airtight container at room temperature. They will maintain their freshness for about a week. For longer-term storage, consider freezing them; simply place them in a freezer-safe bag or container, and they will last up to three months.
If you’re looking to lighten up the recipe, consider using unsweetened applesauce or a sugar substitute. You can also try whole-wheat flour for a heartier texture. Experimenting with different shapes and seasonal cookie cutters can also add to the fun aesthetic appeal!
Conclusion for Stained Glass Window Sugar Cookies
Do yourself a favor: treat yourself to the bright joy of baking Stained Glass Window Sugar Cookies today! They are a delightful fusion of artistry and taste that is sure to impress anyone lucky enough to indulge in them. Bring excitement into your kitchen with this colorful, sweet adventure, and enjoy every step of the baking process. Your loved ones will thank you for it!
FAQs
-
Can I use different kinds of candy?
- Absolutely! Feel free to experiment with various hard candies to change up the flavor and color of your stained glass filling.
-
How do I prevent the cookies from spreading?
- Make sure to chill the dough thoroughly before baking. Additionally, keep your oven temperature accurate with an oven thermometer.
-
Can I decorate these cookies further?
- Yes! Once they are cooled, you can use icing, sprinkles, or edible glitter for added flair.
-
How do I make the cookies softer?
- Under-bake the cookies slightly, and ensure you’re creaming the butter and sugar well to incorporate air.
-
Are these cookies suitable for kids to make?
- Yes! With supervision, this recipe is a fun activity for kids, allowing them to get creative with cookie shapes and colors.