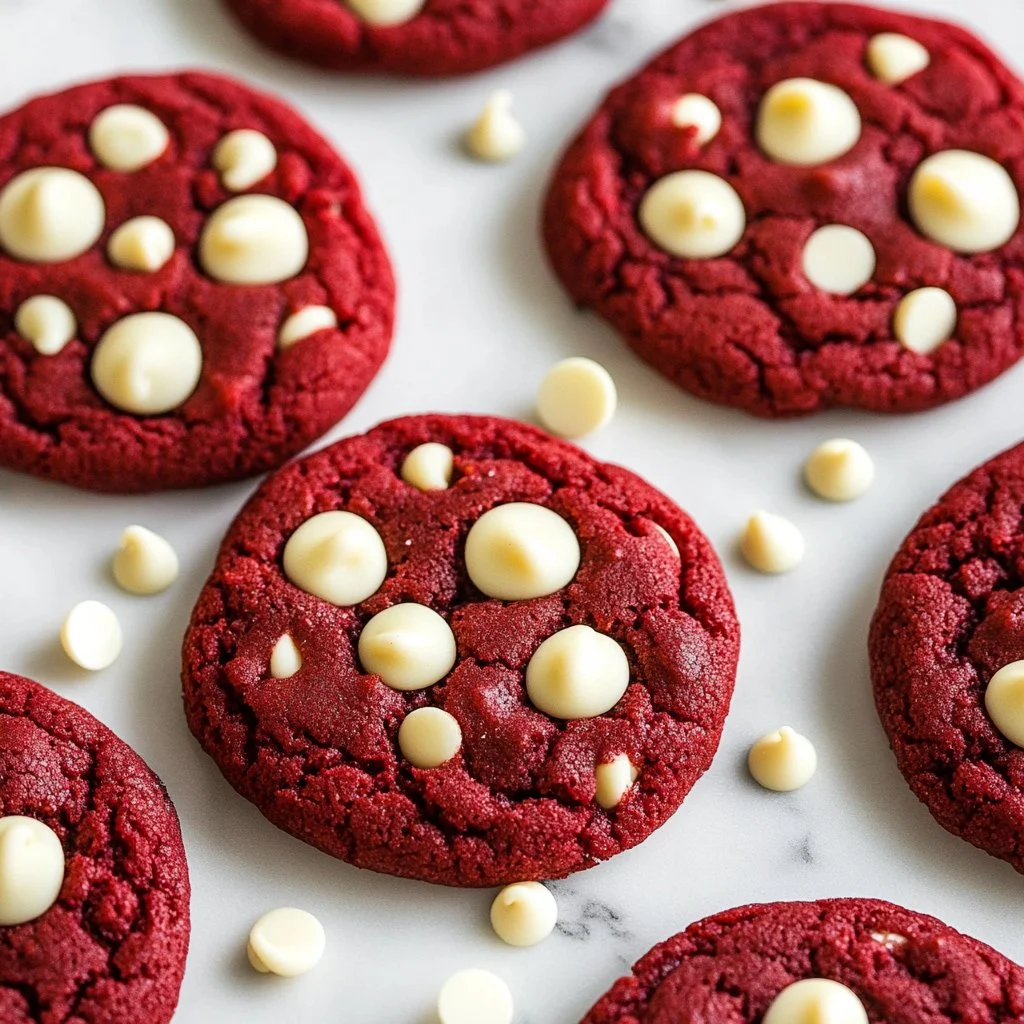
Red Velvet Cookies
The vibrant and luxurious Red Velvet Cookies capture the essence of comfort baking with a delightful twist on the classic red velvet flavor. Irresistibly soft and chewy, these cookies are infused with a rich cocoa undertone, a hint of tanginess, and the sweetness of creamy white chocolate chips that melt in your mouth. As the scent wafts through your kitchen, it evokes feelings of nostalgia, warmth, and love, inviting you to indulge in a moment of pure bliss. Whether you’re looking for a treat for family gatherings or simply want to pamper yourself, this step-by-step recipe guarantees a delicious journey into the world of flavor.
History / Fun Fact
The origins of red velvet cake are steeped in Southern culinary tradition, dating back to the 1800s. Legend has it that the cake gained its iconic color from the reaction of cocoa powder with acidic ingredients such as buttermilk and vinegar. Initially popularated in upscale restaurants, red velvet cake shifted into everyday desserts, captivating the taste buds of many. The creative spirit of this classic dessert led to the evolution of various versions, including the delightful Red Velvet Cookies we make today. Each bite carries a whisper of its rich history, making them not just a treat but a homage to tradition.
Ingredients
To create the perfect Red Velvet Cookies, gather the following ingredients that transform each bite into a decadent experience:
- 2 1/4 cups + 1 tbsp (300g) all-purpose flour – Measured accurately to ensure a soft yet sturdy base for your cookies.
- 2 tbsp (14g) cocoa powder – Offers a deep, rich chocolate flavor that balances the sweetness beautifully.
- 3/4 tsp baking soda – Helps the cookies rise and provides a soft texture.
- 3/4 tsp salt – Enhances the flavors and balances the sweetness.
- 3/4 cup (168g) unsalted butter, room temperature – Creamy and smooth, contributing to the melt-in-your-mouth texture.
- 1/2 cup (104g) granulated sugar – Brings a delightful sweetness.
- 1/2 cup (112g) light brown sugar – Adds a rich, caramel-like flavor for added depth.
- 1 large egg – Binds the ingredients together, ensuring the perfect chewy texture.
- 1 1/2 tsp vanilla extract – Aromatic and sweet, it heightens the overall flavor profile.
- 2 tsp vinegar – Provides a slight tang, a signature of classic red velvet.
- 1 1/2 tbsp red food coloring (less than 1 ounce) – Creates that stunning, signature color.
- 1 cup (169g) white chocolate chips – Creamy bursts of sweetness throughout each cookie.
Cooking Time & Tips for Red Velvet Cookies
When baking Red Velvet Cookies, you have a choice between quick and slow preparation. Quick preparation means combining ingredients swiftly and getting those cookies in the oven for immediate enjoyment. However, if you opt for a slower method, you can take time to chill the dough, enhancing the flavors and achieving a thicker cookie.
Practical Tips for Success:
- Measure ingredients accurately; baking is a science.
- Ensure your butter is at room temperature for easy creaming.
- Don’t skip pressing the white chocolate chips into the tops of the cookies before baking for that extra visual appeal.
- Keep an eye on the baking time; cookies can go from perfect to overbaked in a minute.
Step-by-Step Directions
-
Preheat your oven to 350°F (180°C). Line baking sheets with parchment paper or silicone baking mats and set them aside, preparing for the deliciousness to come.
-
In a medium bowl, combine the flour, cocoa powder, baking soda, and salt. Mix well and set aside, ensuring all dry ingredients are well blended to avoid clumps.
-
In a large mixer bowl, cream the butter and both sugars together using medium speed. Continue to mix for about 2-3 minutes, until the mixture is a light, fluffy color, signaling it’s ready for the next step.
-
Add the egg, blending it in until well combined, creating a silky smooth texture.
-
Incorporate the vanilla extract, vinegar, and red food coloring, mixing until the vibrant hue spreads throughout the batter, creating that enchanting red color.
-
Gradually add the dry mixture to the wet ingredients. Mix gently until everything is just combined, being careful not to overdo it.
-
Stir in the white chocolate chips with a spatula or wooden spoon, ensuring they are evenly distributed. Keep about 1/3 cup aside for pressing into the tops of the cookies.
-
Using a cookie scoop, create 1 1/2 tablespoon-sized balls of dough. Gently roll them into a ball and place them on the prepared baking sheets, ensuring they are spaced about 2 inches apart.
-
If desired, press the reserved white chocolate chips into the tops of each cookie ball for an attractive presentation.
-
Bake in the preheated oven for 7-9 minutes. The cookies will spread slightly, with centers looking soft—don’t overbake them! They will firm up beautifully as they cool.
-
Once baked, remove the cookies from the oven and allow them to cool on the baking sheets for 4-5 minutes before transferring them to a wire rack to cool completely. Enjoy the alluring aroma that fills your kitchen as you wait!
Serving Suggestions & Occasions
These Red Velvet Cookies are not just delightful on their own; they shine at various occasions. Serve them at birthday parties, festive gatherings, or cozy holiday dinners. Pair them with a refreshing glass of milk or a hot cup of coffee for an afternoon pick-me-up.
For an indulgent dessert experience, consider sandwiching two cookies together with a cream cheese frosting or fluffy whipped cream for a luxurious treat that everyone will love. These cookies also make a thoughtful gift when packaged in a beautiful box or tin for friends and loved ones celebrating special moments.
Common Mistakes for Red Velvet Cookies
- Overmixing the dough: Mixing too much can lead to tough cookies. Mix just until ingredients are combined.
- Using cold butter: Room temperature butter is crucial for getting that desired texture.
- Not measuring flour correctly: Spoon and level the flour for accuracy, as too much can lead to dry cookies.
- Not checking for doneness: Cookies may appear underdone but will set as they cool; use the suggested baking time as a guide.
- Using too much food coloring: The red can darken with baking, so stick to the recipe for balanced color.
Healthier Alternatives & Variations
To create a healthier version of Red Velvet Cookies, consider substituting part of the all-purpose flour with whole wheat flour for added nutrients. You could also use coconut oil instead of butter for a dairy-free option. Swap granulated sugar with a natural sweetener like coconut sugar or maple syrup for a lower glycemic option.
For a twist, experiment with different mix-ins like chopped nuts or even cream cheese chips, creating unique flavors that can tantalize the taste buds.
FAQs
-
Can I make the dough ahead of time?
Yes! You can prepare the dough and refrigerate it overnight. Just bring it back to room temperature before baking. -
Can I freeze these cookies?
Absolutely! Bake them, let them cool completely, and then freeze in an airtight container. They can be enjoyed later by thawing at room temperature. -
What can I substitute for the red food coloring?
You can use natural alternatives like beet juice or pomegranate juice, though they may affect the final flavor slightly. -
How do I store leftover cookies?
Store them in an airtight container at room temperature for up to a week, or in the fridge for longer freshness. -
Can I add cream cheese frosting to these cookies?
Yes! Adding a dollop of cream cheese frosting on top will elevate the cookies for a delightful treat. -
What if my cookies are too dry?
Ensure you’re measuring the flour correctly. Adding a splash of milk to the dough can also help enhance moisture.
Conclusion
You won’t want to resist the delectable allure of these Red Velvet Cookies. With their rich history and delightful flavors, they invite you to experience the joy of baking and the pleasure of sharing. Whether it’s a special occasion or a simple craving, these cookies offer warmth and happiness in every bite. So gather your ingredients, embrace the process, and let each step guide you toward a batch of cookies that’s not just a treat, but a treasured memory waiting to be made. Indulge today and experience the magic!