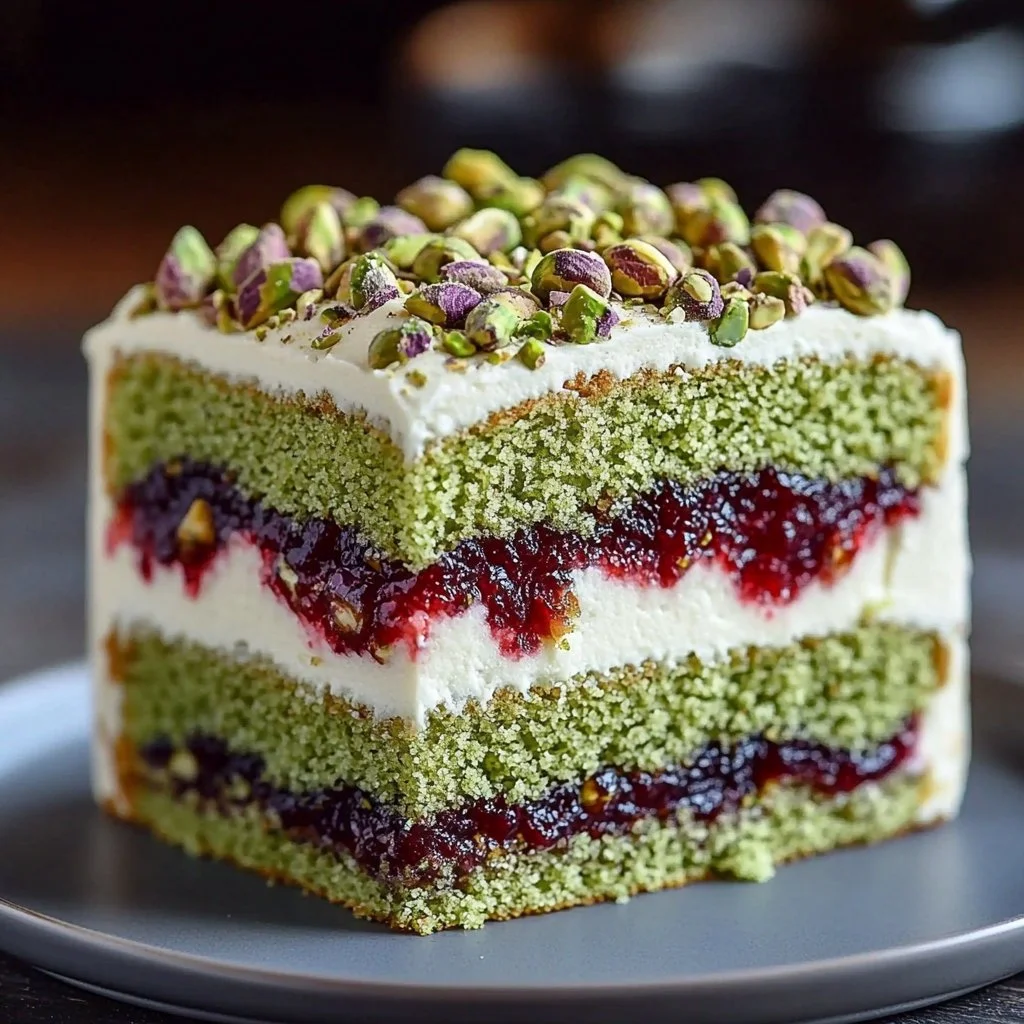
Heavenly Pistachio Raspberry Cake: A Delightful Recipe!
Heavenly Pistachio Raspberry Cake is the epitome of a crowd-pleasing dessert that dazzles both the taste buds and the eyes. This delightful cake combines the rich, nutty flavor of pistachios with the tart sweetness of raspberries, offering a sensory experience that is simply irresistible. Not only is this recipe easy to follow with a clear, step-by-step process, but it also has a comforting, nostalgic vibe that makes it perfect for family gatherings or a casual afternoon treat. The vibrant colors and unique flavors make this cake a wonderful centerpiece for any occasion, ensuring smiles all around.
Why You’ll Love This Recipe
This Heavenly Pistachio Raspberry Cake is not just a treat; it’s an experience! Here are a few reasons why this cake will quickly become a favorite at your table:
-
Easy Prep: With simple ingredients and straightforward instructions, this recipe is accessible even for beginners.
-
Quick Cooking: The bake time of just 25–30 minutes means you can whip this cake up in no time.
-
Minimal Ingredients: The combination of pistachios, raspberries, and basic baking staples creates a balanced yet rich flavor profile without overwhelming the palate.
-
Crowd-Pleaser: Its stunning appearance and delightful flavors are sure to impress guests at any gathering.
Who wouldn’t fall in love with a cake that is as delicious as it is visually appealing?
Ingredients
To create this Heavenly Pistachio Raspberry Cake, gather the following ingredients to ensure a deliciously moist and flavorful result:
-
1 cup unsalted shelled pistachios (plus extra for garnish): These nuts add a creamy, rich quality that pairs beautifully with the other flavors.
-
1 ½ cups all-purpose flour: Provides the structure for your cake.
-
1 ½ tsp baking powder: Gives the cake a lovely rise.
-
¼ tsp salt: Balances out the sweetness.
-
½ cup unsalted butter, softened: For that rich, buttery flavor.
-
1 cup granulated sugar: Sweetness that compliments the tart berries.
-
3 large eggs (room temperature): Acts as a binding agent and helps in achieving a fluffy texture.
-
½ cup buttermilk (or milk with 1 tsp vinegar): Adds moisture and a slight tang.
-
1 tsp vanilla extract: Enhances the overall flavor.
-
½ tsp almond extract (optional): Provides a fragrant touch that lifts the dessert.
-
Green food coloring (optional): For a vibrant pistachio hue.
-
1 ½ cups mascarpone or cream cheese: Gives the cream filling a rich, silky texture.
-
1 cup heavy whipping cream: Adds lightness to the filling.
-
¼ cup powdered sugar: For a hint of sweetness in the cream.
-
1 tsp vanilla extract: A second addition to ensure that creamy layer is full of flavor.
-
1 ½ cups fresh or frozen raspberries: Juicy and tart, the star of the show.
-
¼ cup sugar: To sweeten the raspberries.
-
1 tbsp cornstarch: For thickening the raspberry sauce.
-
2 tbsp water: Helps dissolve the cornstarch.
-
1 tsp lemon juice: Brightens the flavor of the raspberries.
-
Chopped roasted pistachios (for garnish): Adds a touch of crunch and visual appeal.
-
Whipped cream or mascarpone dots (for garnish): To elevate your cake presentation.
Step-by-Step Directions
1. Preheat the Oven
Start by preheating your oven to 175°C (350°F). Grease and line two 8-inch round pans to ensure your cake comes out clean and intact.
2. Prepare the Pistachios
Pulse the unsalted pistachios in a food processor until finely ground. This will be an integral part of the cake batter, infusing it with that signature nutty flavor.
3. Mix Dry Ingredients
In a mixing bowl, whisk together the all-purpose flour, baking powder, salt, and the ground pistachios until well combined. This helps to evenly distribute the leavening agents.
4. Cream the Butter and Sugar
In another large bowl, beat the softened butter and granulated sugar together until the mixture is light and fluffy. This should take about 3 to 5 minutes.
5. Add the Eggs
Add in the eggs one at a time, mixing well after each addition. This helps the cake achieve a smooth, cohesive batter.
6. Incorporate Flavorings
Stir in the vanilla extract and the almond extract (if desired). These fragrant additions elevate the cake’s flavor profile to new heights.
7. Alternate Dry Ingredients and Buttermilk
Begin alternating adding the dry ingredients and the buttermilk to the butter mixture. Mix until just combined. If you’re using green food coloring, add it now for that vibrant touch.
8. Bake the Cake
Pour the batter evenly into the prepared pans and bake for 25–30 minutes or until a toothpick inserted in the center comes out clean. Allow the cakes to cool completely before assembling.
9. Make the Raspberry Filling
In a small saucepan, combine the raspberries, sugar, cornstarch, water, and lemon juice. Cook over medium heat until thickened, stirring frequently. Once thick, let the raspberry filling cool completely.
10. Prepare the Cream Filling
In a separate mixing bowl, beat the mascarpone with powdered sugar and a teaspoon of vanilla extract until smooth. Then whip the heavy cream in another bowl until stiff peaks form, and gently fold it into the mascarpone mixture to maintain its lightness.
11. Assemble the Cake
Once the cake layers are completely cool, slice them evenly. Spread a generous amount of the cream filling on the bottom layer, followed by spooning the cooled raspberry filling over it. Place the second cake layer on top.
12. Finish with Cream
Top the assembled cake with the remaining cream filling, decorating the surface with piped dots of cream and sprinkled chopped pistachios for a delightful presentation.
Tips & Tricks
-
Room Temperature Ingredients: Ensure your eggs and butter are at room temperature to create a smoother batter that incorporates air better, resulting in a lighter cake.
-
Chill the Whipped Cream: For extra stability when whipping the heavy cream, chill your mixing bowl and beaters in advance.
-
Layer with Extra Fruits: Consider adding sliced strawberries or blueberries for additional layers of flavor and color in the raspberry filling.
Serving Suggestions & Pairings
This Heavenly Pistachio Raspberry Cake is best enjoyed with a side of fresh berries or a dollop of whipped cream. It also pairs beautifully with a cup of coffee or a refreshing mint tea. Ideal for birthday parties, brunch gatherings, or simply as a treat on a sunny afternoon, this cake is sure to become a beloved staple.
Nutritional Information
One slice of Heavenly Pistachio Raspberry Cake contains approximately:
- Calories: 350
- Total fat: 22g
- Carbohydrates: 40g
- Protein: 5g
While indulgent, enjoy this cake as part of a balanced diet and share it with friends and family to spread joy!
Storing Tips & Variations
-
Storage: Keep any leftovers in an airtight container in the refrigerator for up to 3 days.
-
Freezing: You can freeze the cake layers separately by wrapping them tightly in plastic wrap and then in aluminum foil for up to 1 month. Thaw before assembling.
-
Variations: Consider experimenting with different fruit fillings, such as strawberries or blueberries, or even switching the frosting base to use Greek yogurt for a lighter option.
Conclusion
Heavenly Pistachio Raspberry Cake is a treat that truly captivates the senses! The delightful combination of flavors and textures makes it perfect for any occasion. Don’t hesitate to try this recipe and share your baking adventure with friends and family. They will surely be asking for seconds!
FAQs
1. Can I use other nuts instead of pistachios?
Yes! While pistachios are central to this recipe, you can experiment with almonds or walnuts if you prefer.
2. What if I can’t find buttermilk?
You can easily make a substitute by mixing regular milk with 1 teaspoon of vinegar or lemon juice and letting it sit for about 5-10 minutes.
3. Can I make this cake ahead of time?
Absolutely! You can bake the cake layers and prepare the raspberry filling a day in advance. Just assemble before serving.
4. How can I make the cake gluten-free?
Substituting the all-purpose flour with a gluten-free flour blend should work well for those with dietary restrictions.
5. How do I prevent the layers from sticking to the pan?
Greasing the pans well and lining them with parchment paper helps to ensure that the cake layers release easily after baking.