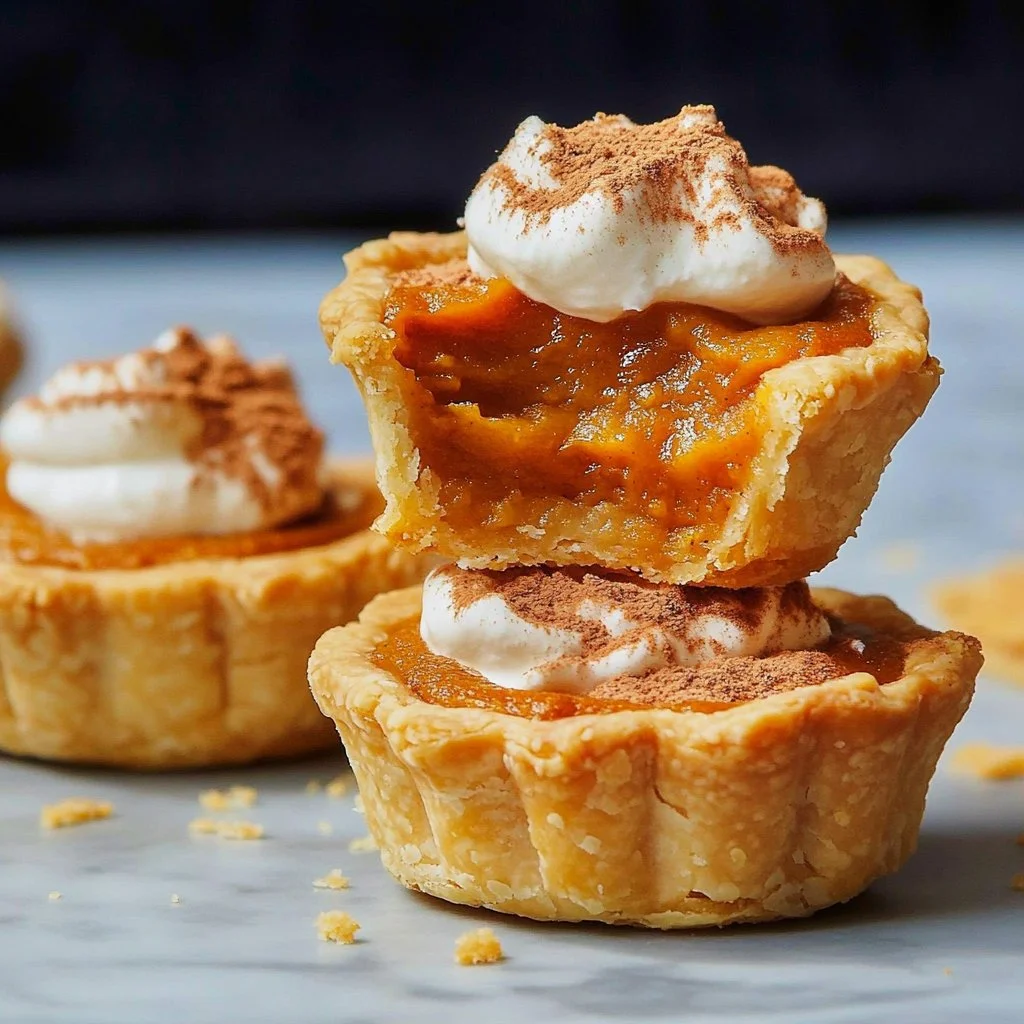
Mini Pumpkin Pies
There’s something irresistibly cozy about the aroma of the Mini Pumpkin Pies that fills your kitchen as they bake. The warm, spicy scent of cinnamon and nutmeg paired with the rich, creamy filling makes it an instantly nostalgic treat. These bite-sized delights are perfect for any occasion—be it for a family gathering, an autumn celebration, or simply a cozy night in. The best part? They’re quick to whip up and kid-friendly, making it a delightful baking activity to share with the little ones. Trust me, once you get a taste of these gooey, golden mini treats, you won’t be able to resist going back for seconds (or thirds!)
What’s Your Favorite Fall Dessert?
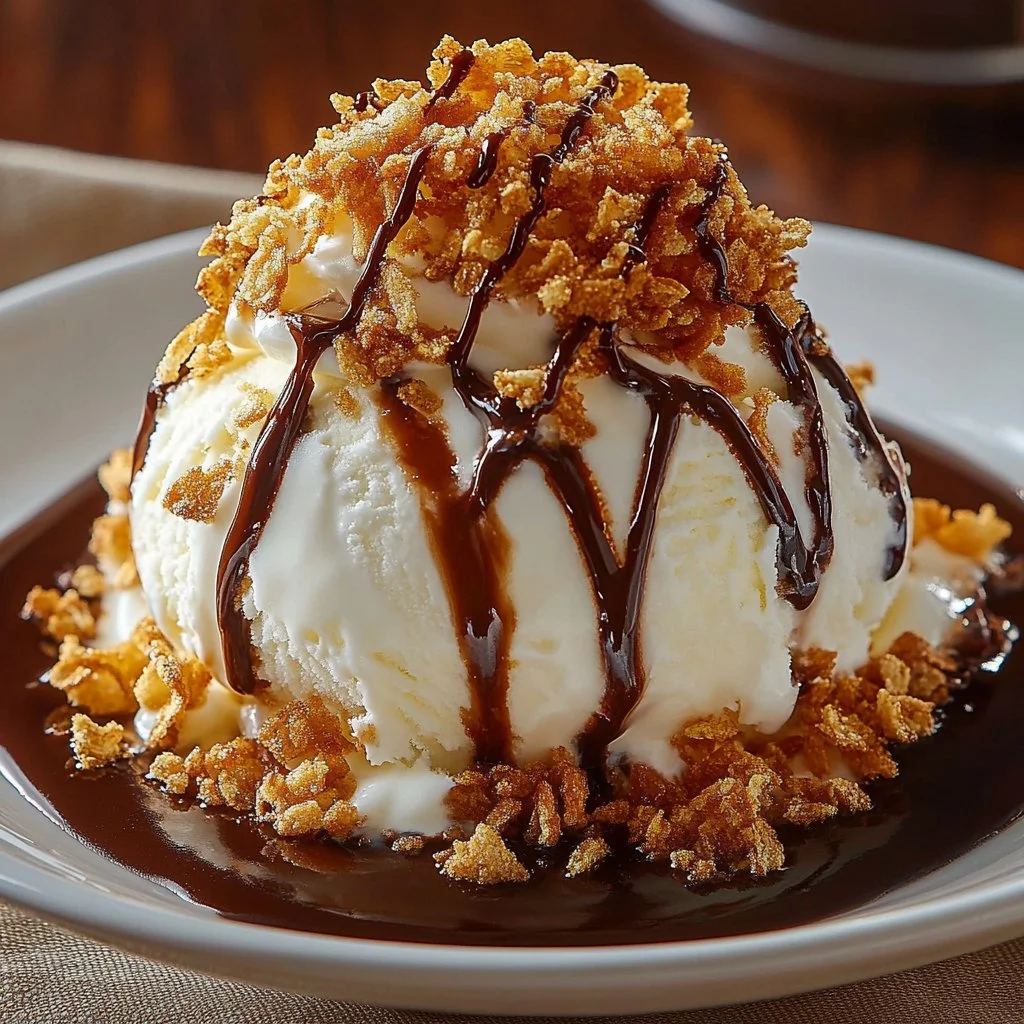
Is there any dessert that feels more satisfying than a sweet pumpkin pie with a crisp crust, especially in the fall? Imagine biting into a treasure of rich pumpkin filling that dances with spices on your palate. Mini pumpkin pies not only deliver the nostalgic flavors of Thanksgiving but they also fit easily in your hand, making them a portable delight! What’s your favorite way to enjoy pumpkin desserts? Is it with a dollop of freshly whipped cream, or maybe a scoop of vanilla ice cream melting into the warm filling?
Why You’ll Love This Recipe
These Mini Pumpkin Pies are simply irresistible for a multitude of reasons.
-
Easy Prep: With minimal prep time, these delightful pies can be made without spending an entire afternoon in the kitchen.
-
Crowd-Pleaser: The bite-sized nature makes them perfect for sharing at parties, ensuring everyone enjoys this seasonal favorite.
-
Nostalgic Comfort: They capture the essence of fall flavors in a format that brings out childhood memories of family gatherings and cozy evenings by the fireplace.
-
Minimal Ingredients: Made with simple pantry staples, these pies are not just easy on the eyes but also on the wallet.
You won’t just make these pies; you’ll create memories that fill your heart with warmth.
Ingredients
For this Mini Pumpkin Pies recipe, you’re going to need:
- Cooking spray or melted butter, for muffin tin
- 1 batch basic pie dough
- All-purpose flour, for surface
- 1 1/3 cups pumpkin puree
- 1 cup sweetened condensed milk
- 1 large egg
- 1 1/2 teaspoons pure vanilla extract
- 1 teaspoon ground cinnamon, plus more for serving
- 1/2 teaspoon ground ginger
- 1/4 teaspoon kosher salt
- 1/8 teaspoon ground nutmeg
- 3/4 cup heavy whipping cream
- Milk chocolate bar, chilled, for serving (optional)
As you gather these ingredients, picture the buttery, flaky crust enveloping the warm, spiced pumpkin filling—the way each bite melts in your mouth with the sweetness of the condensed milk and the satisfying creaminess of the whipping cream on top.
Timing
This recipe strikes a perfect balance between fast indulgence and leisurely enjoyment. From prep to finish, you can have these Mini Pumpkin Pies ready in roughly an hour! They’re the ideal choice for when you want that homemade dessert without the hours of effort.
Imagine the delightful surprise when guests take their first bite—vivid expressions of joy will flood the room, and you can bask in the glory of your instant fame as the host who provided such a delicious treat!
Step-by-Step
Step 1:
Arrange a rack in the center of the oven and preheat to 375 degrees F. Spray the bottoms and sides of a 24-cup mini muffin tin with cooking spray or brush with melted butter, ensuring that these little pockets of heaven won’t stick.
Step 2:
On a lightly floured surface, roll out the pie dough to about 1/8 inch thick. Use a 3-inch cutter to cut out rounds. Gather the scraps and reroll them to cut more rounds until you have 24.
Step 3:
Carefully transfer the rounds to the prepared muffin tin, pressing the dough into the bottom and up the sides. Refrigerate for about 15 minutes, allowing the dough to firm up.
Step 4:
While the dough chills, grab a large bowl and whisk together the pumpkin puree, condensed milk, egg, vanilla extract, cinnamon, ginger, salt, and nutmeg until it’s smooth and completely combined—imagine the luxurious texture!
Step 5:
Spoon the velvety filling into the prepared muffin cups, filling them almost all the way to the top (about 1 heaped tablespoon of filling per cup).
Step 6:
Bake the pies until the center is set and puffed, and the edges are golden—about 25 to 30 minutes. Let them cool in the pan for 10 minutes; they will gently deflate as they cool.
Step 7:
Using a small offset spatula or a spoon, gently remove the pies from the tin and transfer them to a wire rack to cool completely.
Step 8:
In a large bowl, whip the cream to soft peaks. Top each mini pie with a dollop of whipped cream, perhaps offset for that artistic touch.
Step 9:
If you’re feeling fancy, shave some chocolate on top of the pies using a vegetable peeler and finish with a sprinkle of cinnamon.
With each step, your kitchen will fill with delightful scents that invite everyone to gather around, eagerly waiting to indulge in these Mini Pumpkin Pies!
Nutritional Information
Each mini pie offers a comforting balance of sweetness and rich flavors, typically coming in around 150-200 calories nestled within that flaky crust. These treats occasionally indulge your sweet cravings without taking away from your goals. Moderation is key, but can you really resist such tiny bursts of joy?
Healthier Alternatives
For those mindful of their sugar intake or dietary preferences, there are plenty of ways to make these Mini Pumpkin Pies lighter:
-
Low-Sugar: Opt for a sugar substitute like monk fruit or stevia in place of sweetened condensed milk.
-
Dairy-Free: Swap the whipped cream for coconut cream, and use a dairy-free pie crust; the aroma and flavor will still tantalize your taste buds.
-
Gluten-Free: Use a premade gluten-free pie crust or make your own using almond flour or coconut flour as a base.
With these alternatives, you can enjoy the same deliciousness while staying true to your dietary needs!
Serving Suggestions
Mini Pumpkin Pies shine brightly during the fall, making them the star of holiday gatherings. Pair them with a scoop of vanilla ice cream for an indulgent dessert or serve them alongside coffee for cozy brunches with friends.
You might also consider topping them with dried cranberries or chopped pecans for a special twist. Whether at Thanksgiving tables or festive holiday parties, these desserts always evoke feelings of warmth and nostalgia.
Common Mistakes
Everyone has room for improvement, especially in baking! Here are a few common mistakes to avoid when making your Mini Pumpkin Pies:
-
Overbaking: Watch your pies closely; overbaking can lead to a dry texture rather than the creamy, rich experience you aim for.
-
Texture Issues: Ensure that your ingredients, especially the pumpkin puree, are well mixed to avoid any lumps, providing a smooth, luscious filling.
-
Messes: Use flour adequately to prevent sticking during the rolling process; a bit of extra care can save you from frustration later on.
Storing Tips
If you manage to have leftovers (which is rare), storing these little delights is a breeze!
- Freezing: Place them in an airtight container and freeze them for up to a month. Thaw them in the refrigerator overnight when you’re ready for a treat!
- Reheating Instructions: Reheat in the oven at 350 degrees for about 10 minutes once thawed—just enough to warm up without losing that lovely texture.
Tempting Conclusion
If you haven’t raced to the kitchen yet, now’s the time to get your hands on those adorable Mini Pumpkin Pies! Filled with the essence of fall, these delightful morsels are a crowd-pleaser, bringing joy and warmth to every occasion. With every bite, you’ll experience the nostalgia of autumn, making the effort put in totally worth it. Hurry, gather your ingredients and start baking these little gems—your taste buds will be forever grateful!
FAQs
-
Can these Min Pumpkin Pies be made vegan?
Yes, you can use plant-based alternatives for pie crust and replace the egg with ground flaxseed or a vegan egg substitute. -
How do I prevent my crust from getting soggy?
Precook your crust slightly before adding the filling to set it and prevent it from becoming soggy. -
Can I use fresh pumpkin instead of canned?
Absolutely! Make sure to cook and puree it properly until smooth for the best results. -
How do I know when my pies are done?
The pies are perfect when the edges are golden and the centers are puffed but still slightly jiggle when shaken gently. -
Can I double the recipe?
Yes, just use two muffin tins or bake them in batches to enjoy even more of these delicious treats!